My dad used to have a 'do it yourself pizza night' when we were young - he would put out a bunch of toppings, sauce, and pitas. My brother and I would go wild making our own pizza combinations. This was a favorite dinner and my feelings remain the same today. Since Daiya seems to have a 'cheese' that actually tastes good I've got back into it. This is too easy and so great every time.
1. First you take the Pita out - I like to brush the back side with oil & then lightly salt it.
2. Next up - make your Pizza Sauce - Soooo easy - just chop up a few tomatoes, toss them in a pot with some dried basil, a sprinkle of hot sauce, & a few shots of worchestershire - to that add a bit of Olive Oil - now cook at Med heat to reduce it down (basically cook off the water). Tasty in no time! Spread this on the top of the pita.
3. Toppings are a must! This time I went with Orange Bell Pepper, Portabello Mushroom & Fresh Tomato.
4. Top everything with the Daiya Mozzarella and bake at 350 F for 10 Minutes. I like to add 2 minutes under the broiler to finish it up. Ta Dah - mini pizzas. Enjoy.
Cooking Vegan recipes from my Corydon Village home in Winnipeg, MB. I'll be posting recipes tried and tested by me - plus favorite Vegan Products and where to get em in the city.
Labels
Almonds
Apple
Asparagus
Banana
Biscuits
Bread
Breaded
Breakfast
Bun
Canning
Chia Seeds
Chickpeas
Cinnamon
Coconut Milk
cookies
Crust
Curry
Daiya Cheese
Earth Balance
Fried
Granola Bars
Gravy
Green
Hemp Seeds
Hummus
icing sugar
Jalapeno
Jalapenos
Joy of Vegan Baking
Kale
Leak
Lentils
mexican
Mondragon
Natural Products
Pasta
Pecan
Pickled
Pie
Pita
Pizza
Portobello
Potato
Products
Pumpkin
Quinoa
Recipe
Salsa
Sandwich
Seitan
Soup
Squash
Syrup
Taco
Tempeh
Tofu
Tofurky
Tomatoes
Vegan
Veganaise
Veganomicon
Veggie Burger
Yam
Showing posts with label Recipe. Show all posts
Friday, October 1, 2010
Monday, September 27, 2010
Apple Pie Filling
Got Apples? After my grandparents gave me 4 big bags of apples from their apple tree I had to come up with a creative way to use them quick. Apple Pie Filling anyone? This was pretty easy - but you do need the basic canning supplies if you want it to keep on a shelf for any length of time. If not, would keep fine in the fridge with no hot water bath necessary.
1. Wash and Peel your apples. As you peel them sprinkle with lemon juice - to avoid them going brown. Here's my man peeling away (nice if you can get help). I did try using an apple peeler thing but it was more fussing around than time saving:
2. Core & cut the apples. You can use a cool little Apple Corer-Cutter Tool (costs like $8 at Safeway) - this was a great time saver and super easy to use. Cut up as many apples as you plan on using. As you pile them up sprinkle them with lemon juices to keep them from browning.
3. After cutting you need to Blanch the apples - heat up a big pot of water - you'll need a basket or something to put the apples in - then dip the apples into the boiling water for 60 seconds & take them out. Done. Stops them from degrading.
4. Apple Syrup! You need to make this to pour over the apples! Here's the recipe I used from this online site (that has more details than I'm putting here!) - this makes around 6 liters of syrup - enough for 6 1 L jars of filling: 2.5 cups water, 5 cups apple juice, cinnamon (lots of it), 3/4 cup lemon juice, 2.5 cups honey (my choice), 1.5 cups Corn Starch (mixed up in water first) - Simple: put all the ingredients together in a big pot except corn start - bring to boil - then whisk in the corn starch - the syrup will start to form really fast.
6. Follow normal canning instructions - give the jars a 30 minute hot water bath. (Canning is easier than you think... if you haven't done it yet!)
2. Core & cut the apples. You can use a cool little Apple Corer-Cutter Tool (costs like $8 at Safeway) - this was a great time saver and super easy to use. Cut up as many apples as you plan on using. As you pile them up sprinkle them with lemon juices to keep them from browning.
3. After cutting you need to Blanch the apples - heat up a big pot of water - you'll need a basket or something to put the apples in - then dip the apples into the boiling water for 60 seconds & take them out. Done. Stops them from degrading.
4. Apple Syrup! You need to make this to pour over the apples! Here's the recipe I used from this online site (that has more details than I'm putting here!) - this makes around 6 liters of syrup - enough for 6 1 L jars of filling: 2.5 cups water, 5 cups apple juice, cinnamon (lots of it), 3/4 cup lemon juice, 2.5 cups honey (my choice), 1.5 cups Corn Starch (mixed up in water first) - Simple: put all the ingredients together in a big pot except corn start - bring to boil - then whisk in the corn starch - the syrup will start to form really fast.
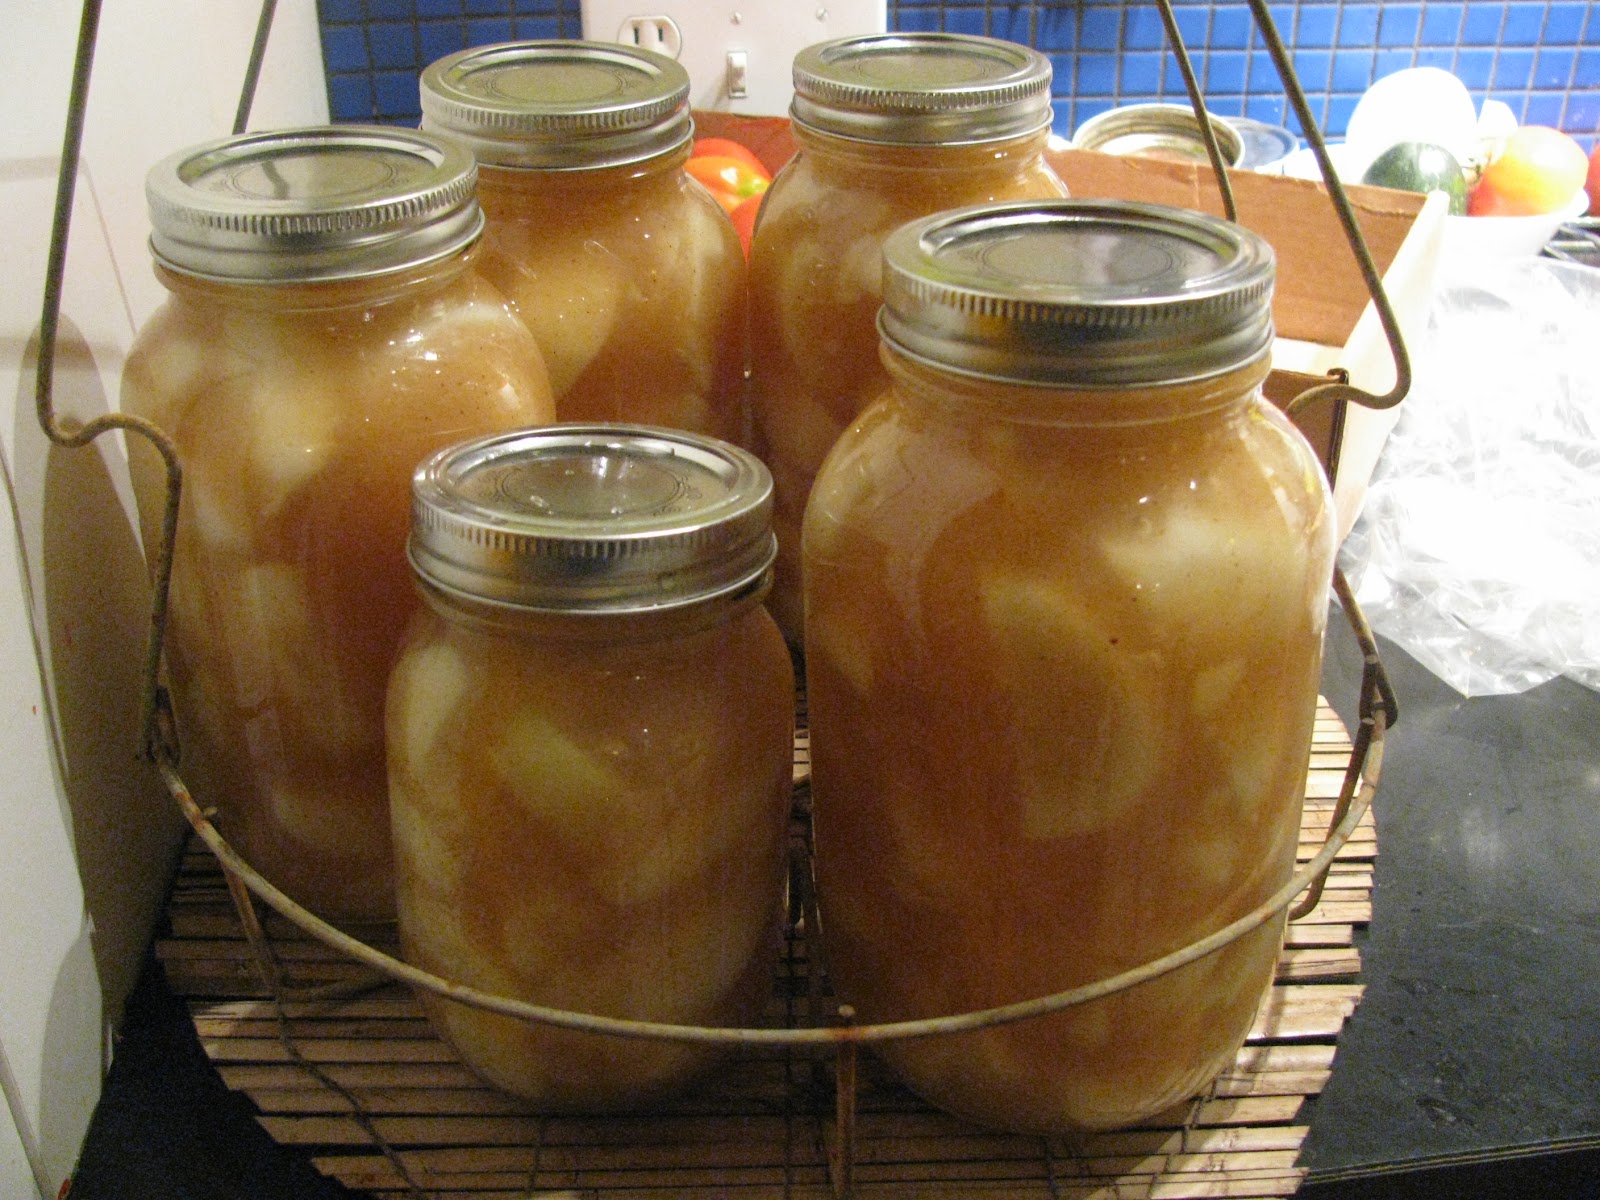
5. Layer the Apple Syrup & Apples in 1 L Mason Jars.
7. Voila! Apple Pie filling that will keep for up to 2 years! (Now for the tricky part... making a pie! That I have yet to do). You can do the same thing and skip the hot water bath - just be sure to keep the jars in the fridge then.
Subscribe to:
Posts (Atom)